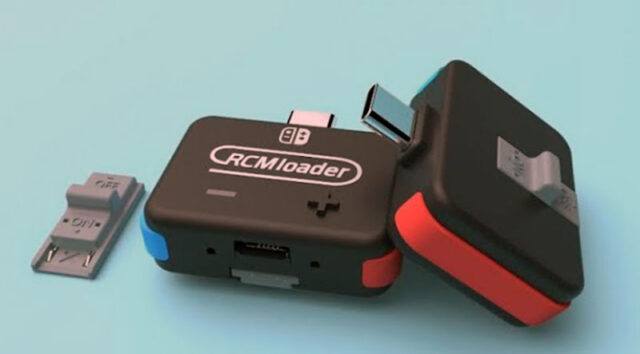
Nowadays, many users know about Nintendo Switch jailbreak, and RCM Loader is one of the methods available to do this. The SX Pro from Team Xecuter is one of the most well-known tools for this, although there are more similar items such as the R4S dongle or Acens Pro. This post will explain what a payload is and how to install it on the Nintendo Switch.
There are several Switch modchips available like RCM Loader One, including the R4S Dongle, the AceNS launcher, the SX Pro, the SX Gear, and various less expensive clones. The SX Pro is a really nice option as it allows boot SX OS CFW on your Switch, and users can play free games, download and utilise homebrew programmes, and extend Switch storage up to 4TB via external USB Device compatibility, effectively employing an HDD.
The SX Pro comes as a full kit and the world’s first Nintendo Switch hacking tool that includes the SX OS licence, the SX Gear or the SX Pro dongle if purchased separately and the SX Jig. SX Gear is one that acts as an RCM loader in this configuration.
For your convenience, below are the SX Gear specifications.
- Compatibility with the SX OS source code as well as the third-party payload
- Allows CFW payloads to boot on the Switch in order to run modified firmware.
- Enables the installation of SX OS CFW on multiple Switch consoles.
- Lower pricing without sacrificing the SX Pro dongle and jig’s quality.
- Simply connect and play.
- Ongoing support from Team Xecuter
RCM loader One Characteristics
- Backward compatible with all Nintendo Switch systems manufactured prior to June 2018.
- Nintendo Switch was created for the purpose of transferring payload.bin files to your console.
- With a single click, you can switch between Atmosphere, ReiNX, and SXOS payload files.
- The gadget is rechargeable. With a one-hour charge, you can transmit a payload 1,000 times.
- It is simple to use; when connected to a computer or smartphone, it is recognised as a memory card right away.
- Compatibility with macOS, Windows, Linux, and Android platforms.
Nintendo Switch RCM Loader Manual

Very seldom, the RCM Loader becomes blocked. In certain instances, a reset is required. In the figure above, the reset point is indicated.
How to use the RCM Loader One for the Nintendo Switch?
- Nintendo SwitchPlace the required files on the micro SD card (Atmosphere, reinx, or SXOS). If you pick which crushing process files are associated with him, you may put them on your micro SD memory card.
- Micro recommends that you format your SD card as exFAT because this is required in order to toss files greater than 3.7GB at once.
- Use the USB port on the Nintendo Switch to connect the loader dongle and RCM jig attachment.
- The Switch’s USB charging connector and right joycon rail will be linked to the RCM jig.
- Press and hold the volume up key (+) and the power button at the same time (volume up key first). By simultaneously tapping the power and volume up keys, you will initiate the CFW breaking procedure. The procedure begins when text or images appear to indicate that it has begun. After going through the visualisations such as text and images and reaching the main menu, remove the Loader and RCM Jig attachments from the Nintendo Switch.
- Make use of the most recent games and homebrew applications!
On the RCM Loader One, which payload files are installed?
All payload files supplied thus far have been installed. You can swap between payload files as necessary.
The table below indicates which CFW breaking procedure is utilised in which colours are based on the loader’s lights. A short push of the + button on the RMC Loader identifies the CFW in which you are now operating.
It shifts to the payload of the next system if you hold down the + button for three seconds. This is how Atmosphere, ReiNX, and SXOS will be switched amongst themselves.
If the battery level of the RCM LOADER has declined, you may determine this by the following: If you push the + button for a brief period of time, it flashes red and green, indicating that the battery is about to run out. You’ll be charged for one hour and receive a three-month standby time.
Uploading payload files
- To begin with, connect the loader to your computer via USB; your computer will recognise it as a flash disc.
- After familiarizing yourself with your PC, submit your payload file in the appropriate field.
